


This is such a common question that people ask “How do you photograph newborns?” Well I can tell you from 10 years of experience that I truly underestimated what was involved when I first started. I thought that if I had my camera, a window, a cheap bean bag and some blankets with a couple headbands that I was good to go. What I didn’t realize is that newborn photography is not only challenging, expensive and truly exhausting – It’s an art. Let me tell you a little bit more about how to photograph newborns, and what you need to get started so you can decide if this is something you’d like to pursue!
First I’d like to explain a few crucial items that you need to invest in first before you can ever do your first newborn photography session:
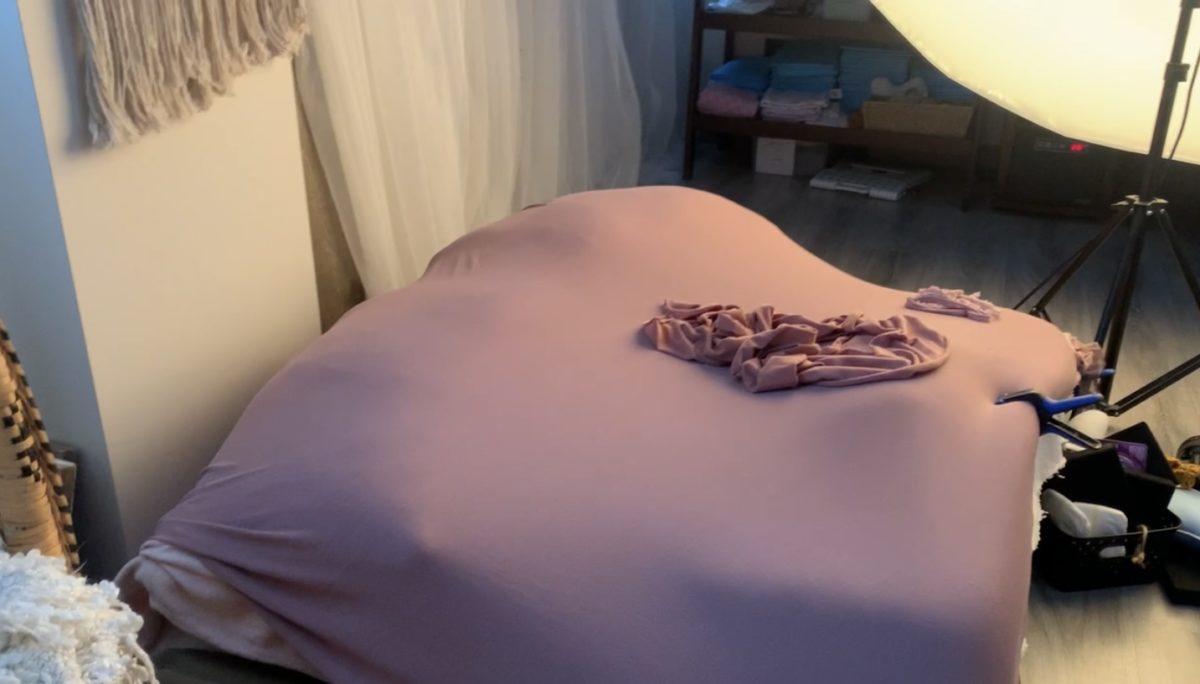
- Firm surface to pose baby on. This can be an ottoman, a firm bean bag, a dog bed (a frame with mesh fabric) or a posing table.
- Posing tools such as Shape Shifters from Hello Little Props, or posing beans from the Original Photoblocks or you can create your own DIY POSING TOOLS with foam rollers. Yes you do NOT need expensive posing tools as long as they are firm! You can even use pool noodles like I demonstrate in my DIY Posing Tools youtube video
- You need to use a soft but firm grippy surface on top of your poser such as thick foam. This is ideal if posing on a table or dog bed especially. It allows the fabric to grip to it, and your baby to have a soft but firm surface to lay on.
- A few thin fleece blankets or layers of fabric to add to the bottom layers, and then build up with another 8-9 layers of fabric on top. This allows the posing tools to be smooth under baby and not show through a few thin pieces of fabric.
- Clamps! You need clamps to clip and pull your fabric tight on the corners and in the front to keep everything smooth and wrinkle free. Do not waste your editing time on something that could have been prevented in the first place!
- White noise machine. Whether its your old machine from when you had your own children, or if its a baby shusher from amazon, or even a white noise app on your phone and hooked up to a blue tooth speaker – YOU NEED IT! I’ve recently purchased an Alexa for my Edmonton Newborn Photography studio and have created a white noise playlist that just runs during a session. This keeps my phone free and I don’t have to worry about speakers dying from a low battery charge.
- Next you need to decide on fabric and colours for your newborn sessions! This is really important because if you choose the wrong type of fabric or colours you could end up with an editing nightmare. Bright colours will colour cast all over your newborn baby, and making true to life skin tones nearly impossible! OR your fabric could be scratchy and cause irritation to the baby’s skin. What if the fabric isn’t stretchy? And then it just causes wrinkles and you now have another issue to work out. Fabrics that I recommend investing in are: Jersey knit, Sweater knit, cashmere knit. You want to make sure your fabric is soft, and can stretch preferably in both directions.

- Pacifiers. Yes you need to have additional pacifiers around the studio so that when parents do not bring one, you have some on hand to use when the baby is full but trying to soothe. This can cause a newborn a lot of frustration and your session to hit a wall. Avoid this situation and have them stocked.
- Having some baby wipes and a few diapers on hand can also be very useful. Sometimes a baby has several explosions and mom only packed 3-4 diapers and new parents hate to see a wet diaper on their new baby and tend to change them constantly. I have personally had parents run out of diapers and I fortunately had something to send their new baby home in.
- Burp cloths or receiving blankets are also necessary! You can use them to wrap the baby while undressed, and if the baby pees on it then it’s no big deal. You aren’t sending wet laundry home with the parents. And as a newborn photographer, I ALWAYS have a few loads of laundry to do after a newborn photography session.
- Space heater. Yes you need to have the room nice and warm. This is very important for the undressed portion of your newborn photography session. If a baby is cold and getting undressed, that baby is going to startle, cry and wake up. This means you are going to spend a lot of time getting that baby back to a sleepy and comfortable position. I like to leave my space heater on until I start wrapping baby up. At that point then I shut it off, and allow the room to cool down. This helps baby stay at the right temperature and not to overheat. It also makes it so much more comfortable! Are you wondering what sort of clothing parents should be wearing to the session if the room is so hot? Well this involves sending the parents a PREP GUIDE. You can click on this link to purchase.
- Black out curtains. This is important because you don’t want mixed lighting coming into your shot. You want to have complete control over the light so you can manipulate it to your needs. Are you familiar with studio lighting but do not understand where the light should be? So many people are under the impression that you need to look for that butterfly shadow, but then they forget about everything else involved. Or perhaps you are so focused on what angle the light needs to be at, you have no idea why the image isn’t getting the desired look you are after! Check out my amazing Lighting tutorial that really opens your eyes and explains and shows you how to find the light and adjust what you need to get it.
Now you know all of the things that you must have available to you to just handle the fabric posing side of things. But what about the props? What sort of props are important and how can you safely handle a newborn baby posing in a bucket or in a basket? First before we get into posing details, lets talk about props. You do NOT NEED every prop out there. You only need 4 solid and high quality props to get you started.
-First a wooden bucket. They have thicker rims then a metal bucket and are heavier and sturdier for babies
-Second is a nice wooden bowl. You can find some at antique stores if you look hard.
-Third a nice round basket. This can be used for multiple poses too
-Fourth is a Flokati. Flokati’s are a flexible fluffy carpet made of wool and can come in a variety of colours. These are great for posing baby directly on and using for siblings.

Now that we’ve talked about props you need to thick really hard about what sort of Newborn Photographer you want to be! Do you want to be someone who is sort of good at lots of poses, or amazing at a few poses? Because when you begin to have consistency in your posing, your lighting, your editing and your styling you will suddenly have so many referrals you can’t keep up!
So rather then be mediocre why not be amazing and deliver a solid beautiful gallery for every client?! The secret to this is having a newborn photography posing workflow. This workflow can consist of several or a few of the same poses on the fabric, and then the same prop poses for every newborn photography session. Newborn photography posing workflows are important because it allows you to perfect your craft! It takes you from amateur to professional. Education is the KEY. Not just trial and error. People don’t want to pay you if you can’t deliver.
At my cozy newborn photography studio located in Edmonton Alberta (well actually closer to Leduc Alberta) nice and close to the Edmonton International Airport and new Casino, Costco and Outlet mall I have focused on for the past 4 years doing the same workflow for every newborn session. Yes I do incorporate new poses and new props into my newborn photography sessions BUT I still keep the same workflow for every client. This allows me to know at what point I need to either speed things up or skip something to keep my session on track. I’m also able to seamlessly transition from what pose to another. When you decide what poses you want to really get a grasp of, check out some of my tutorials below! You can also get a great idea for what those poses look like in my blog post about newborn photography mentoring!
>>>You can find all of my newborn posing tutorials located on my teaching website at momtogeducate.com
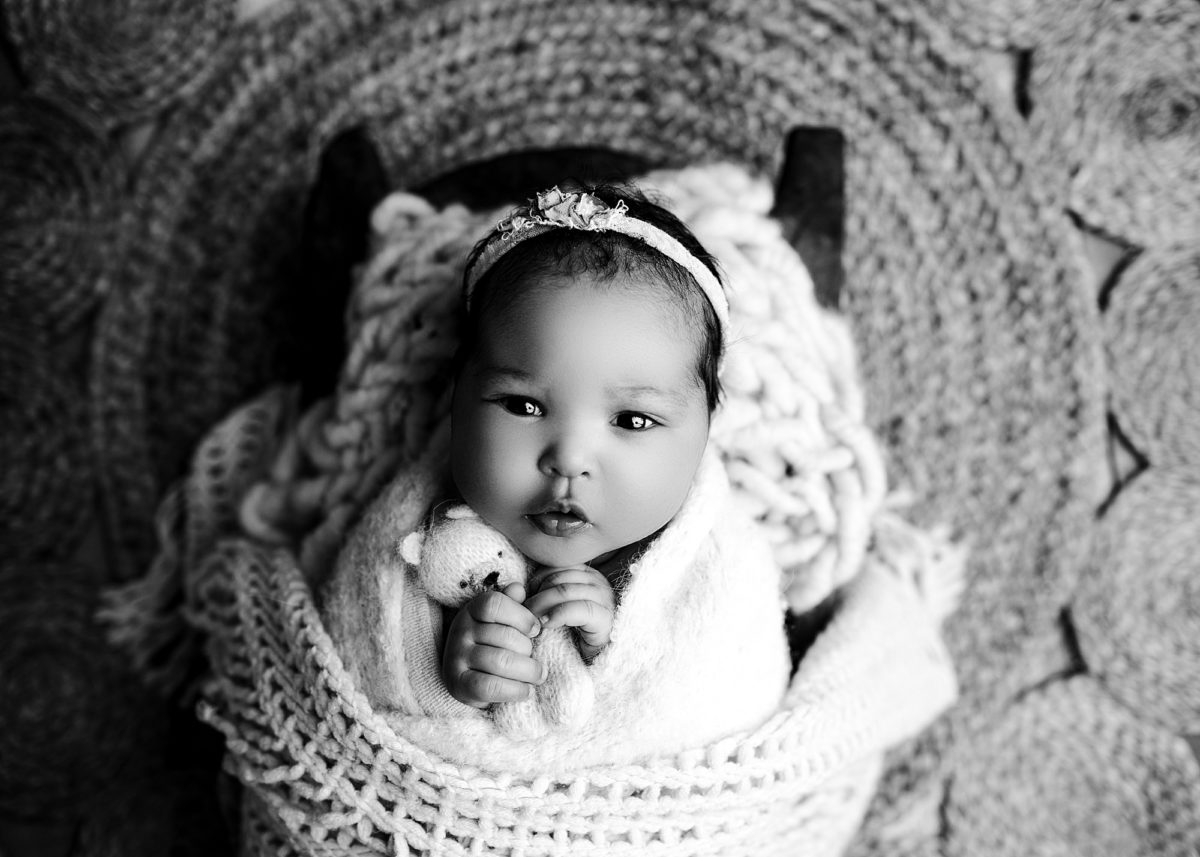
I also have a brand new posing tutorial located here on “How to do the newborn Froggy pose“. This pose is not recommended for those that are new to newborn photography. The reason is that this needs to be done as a composite and the photographer should be experienced in newborn photography posing to execute this specific pose confidently and safely. This newborn posing tutorial also includes a complete editing video and set up video. It is a 38 minute long video that also includes a bonus posing tutorial of the image shown below:
Let’s review How to be a newborn photographer | Edmonton Newborn Photographer
So now that I have given you the run down on all the basics, You need to remember a few things before you jump in to the newborn photography world.
This is a large investment of time and money. You need patience and you need to realize that if you are looking to make a quick buck, this career isn’t for you. You need to develop the skills to create beautiful newborn photography art. Art that people will cherish. But in order to create that art you need to get all your ducks in a row too. So beyond the list of items above, you need a solid editing computer that has an excellent screen for calibration to match your edits to your prints. And you need to invest in a mirrorless or DSLR camera. Anything less will stunt your growth as a business.
You NEED Photoshop CC. Yes, not just lightroom. When photographing newborns you NEED AND MUST HAVE Photoshop CC. Babies come with scratches, acne, bruising and funny skin colours. The only way to correct them is in… You guessed it – Photoshop.
If you are interested in learning more, make sure to watch some of my editing tutorials available on my Youtube Channel
Thank you for sticking around to the end of this blog. There are so many different things that I could get into, but this blog has all of the basic needs that you must think about when deciding if you should go into newborn photography as a career and when you consider the question “HOW DO YOU PHOTOGRAPH NEWBORNS?“
Feel free to leave me a question in the comments below that you’d like my next blog post to be about!
Kat